2.8. DesignCore® NVIDIA® Jetson SerDes Sensor Interface Card
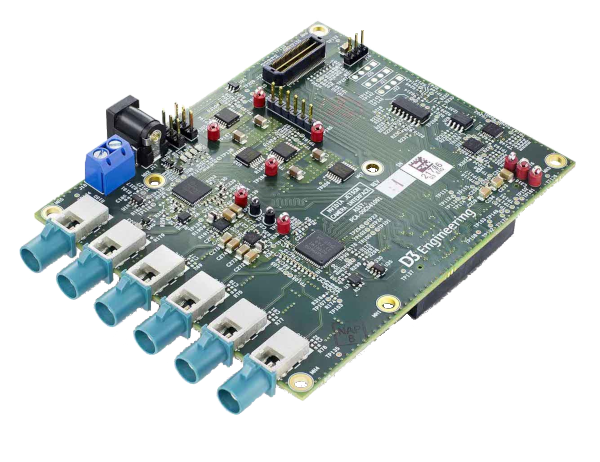
D3 Embedded’s DesignCore® NVIDIA® Jetson SerDes Sensor Interface Card is an add-on for the NVIDIA Jetson AGX Orin Developer Kit. The card supports both FPD-Link III and GMSL 2 sensors along with a direct MIPI CSI-2 sensor via its expansion header.
See also
Jetson AGX Orin Developer Kit User Guide
DesignCore® NVIDIA® Jetson SerDes Sensor Interface Card Datasheet
2.8.1. Getting Started
Setup of this interface card is straight-forward. The basic sequence is:
Install and flash JetPack 6.2.1 (L4T 36.4.4).
Connect the interface card to the developer kit.
Install and configure D3 Embedded’s support packages.
2.8.1.1. Install JetPack
Follow the steps in Setup JetPack Flashing Environment to setup your JetPack flashing environment.
2.8.1.2. Flash JetPack
Connect power to the developer kit using the power adapter included in the developer kit. Connect it to the USB-C port under the barrel jack port.
Place the Orin into recovery mode:
Hold down the RCM button (middle button). Do NOT release yet.
Press and release the RST button (closest to the microSD card slot).
Release the RCM button. The Orin is now in recovery mode.
Connect the host computer to the Orin’s USB-C port for flashing. This is the port to the right of the 40-pin GPIO header.
Caution
Attach the USB-C cable directly to the host computer. Connecting to a dock or USB hub will slow down the flash process significantly and may cause it to fail!
Open a terminal in your flashing environment directory created in the previous section. Run one of the following commands:
Using the Orin’s on-board eMMC storage
sudo ./flash.sh jetson-agx-orin-devkit internal
Using a M.2 NVMe drive
sudo ./tools/kernel_flash/l4t_initrd_flash.sh --external-device nvme0n1p1 \
        -c tools/kernel_flash/flash_l4t_external.xml \
        --showlogs --network usb0 jetson-agx-orin-devkit internal
After flashing, the SoM will reboot into Ubuntu. Connect a monitor to the carrier board and complete runtime configuration (selecting timezone, creating a user, etc.).
Note
The runtime configuration screen may time out if a monitor is not connected fast enough. If this occurs, simply reboot the SoM by pressing the RST button or by removing and reconnecting power.
2.8.1.3. Connect Interface Card
Now that the Jetson is flashed, it is time to connect the interface card to the developer kit.
Power down the Jetson, and remove the power cord. We strongly recommend wearing a properly grounded ESD anti-static wrist strap for the next steps to prevent any damage caused by ESD.
Remove the bottom plate covering the various peripheral ports and carrier board using a screwdriver. It must be removed because it prevents the interface card from seating properly into the connector.
Seat the interface card on the Jetson’s Camera Expansion Connector. This is the long connector labeled “CAMERA” in the center of the board.
Once seated, connect the desired cameras to a compatible FAKRA port.
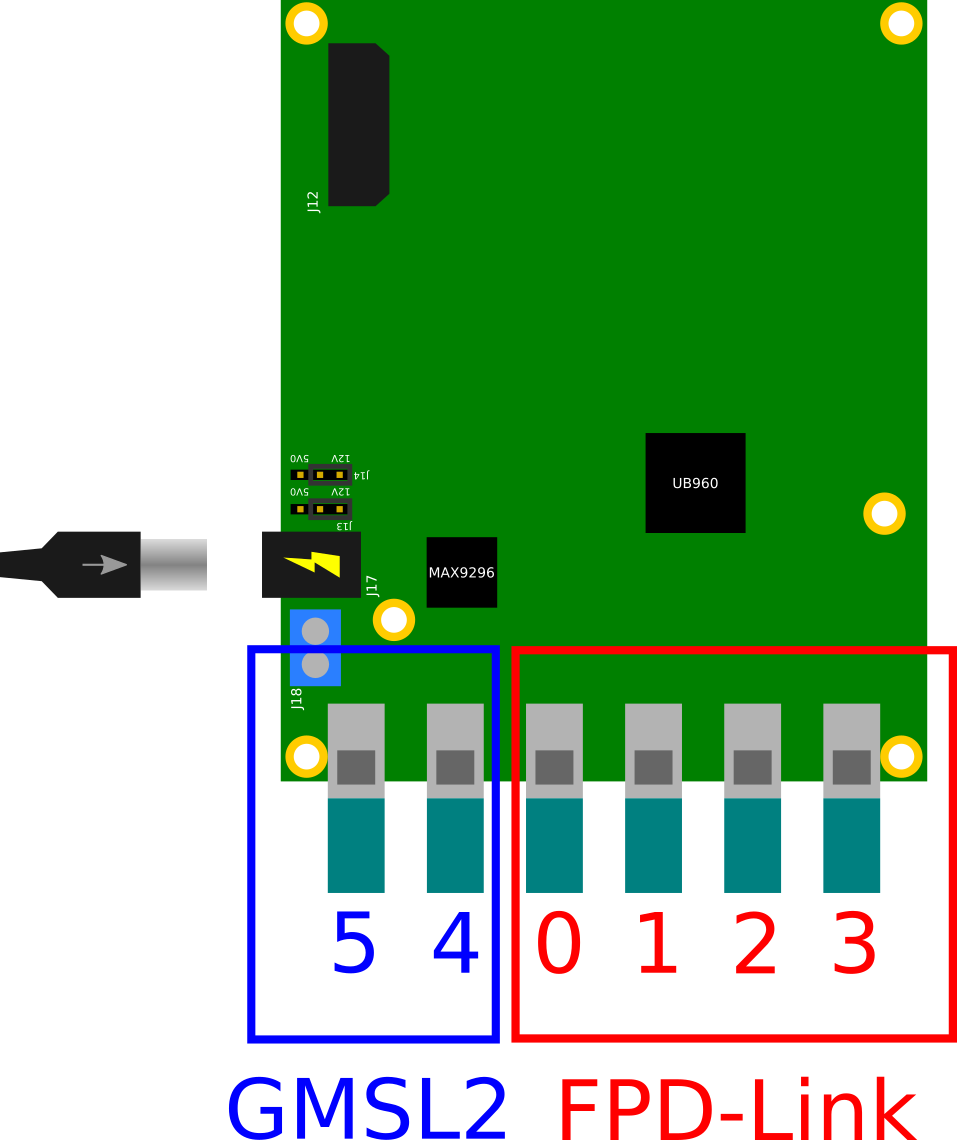
FPD-Link: J6, J7, J8, and J9
GMSL: J10 and J11
Once all cameras are connected, supply 12Vdc power to the interface card. There are two possible methods:
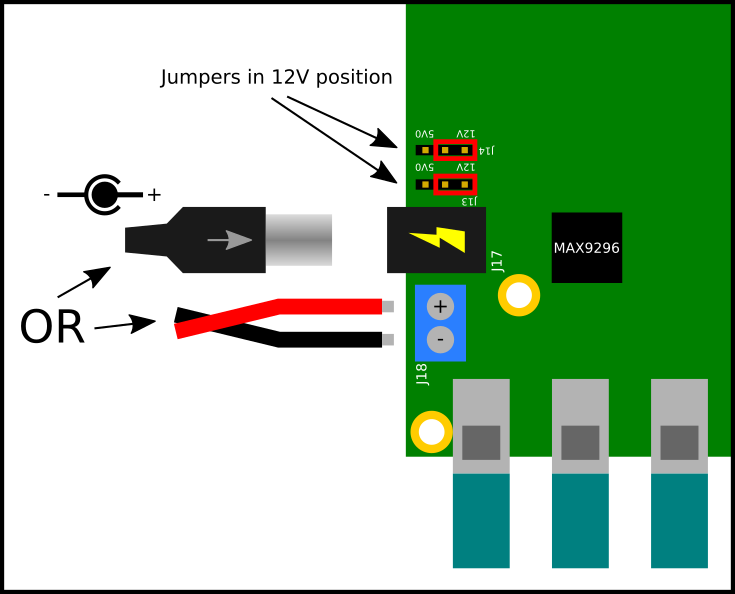
Barrel jack (J17)
Ensure your power supply provides 12Vdc with at least 1.8A of current
Ensure your power supply is center-positive, meaning the center is +12Vdc and the outside sleeve is ground
Screw terminal (J18)
Ensure your power supply provides 12Vdc with at least 1.8A of current
Ensure you connect the positive wire to the positive lug and the negative wire to the negative lug. The positive lug is closest to the barrel jack. The negative lug is closest to the FAKRA ports.
Do NOT supply power to both ports. Only use one at a time.
Re-connect power to the Jetson and power it on.
2.8.1.4. Install Support Packages
Make sure the Jetson is connected to the internet. Download the release package to the Jetson using its web browser or SSH. Extract the archive. Install the required packages for this carrier board from the extracted bin folder:
sudo apt update
sudo apt install ./d3-6x-serdes_*.deb \   # Carrier board Devicetree
   ./d3-jetson-util_*.deb \               # Utility scripts
   ./d3-max9x_*.deb \                     # GMSL drivers
   ./d3-ub9x_*.deb \                      # FPD-Link drivers
   ./d3-regctl_*.deb                      # Utility library for D3 drivers
Note
Do NOT use sudo apt upgrade. This could break your system and require a re-flash.
Install the specific camera package(s) you would like to use:
# For each camera model you plan to use, run this command. Replace
# [cameramodel] with your camera's model. For example, ar0234 or imx390 or isx031.
sudo apt install ./d3-[cameramodel]_*.deb
2.8.1.5. Configure Software
Follow the steps documented in Configure D3 Embedded Software. Refer to the below diagram for the mapping between physical port and port number. Note that FPD-Link cameras cannot be used on GMSL ports and GMSL cameras cannot be used on FPD-Link ports.
2.8.1.6. Further Setup
These steps have accomplished the following:
Installed the Ubuntu operating system on the Jetson
Installed the drivers and Devicetree necessary to use all of the features on the interface board
Installed some sample applications for using cameras
The reins are now yours. Thank you for trusting us with your embedded needs, and we wish you the best of luck! We’re excited to see the amazing things you’ll make with our interface card. If you run into issues, D3 Embedded support is just an email away. Happy building!
Check out these sections:
2.8.2. Advanced User’s Guide
2.8.2.1. Direct MIPI
Direct MIPI is available with the Samtec QTH-030-01 connector (J12). It is not directly supported by the software release, but can be brought up with changes to the Devicetree and drivers. For example Devicetree and drivers, see the source code in the release package.